
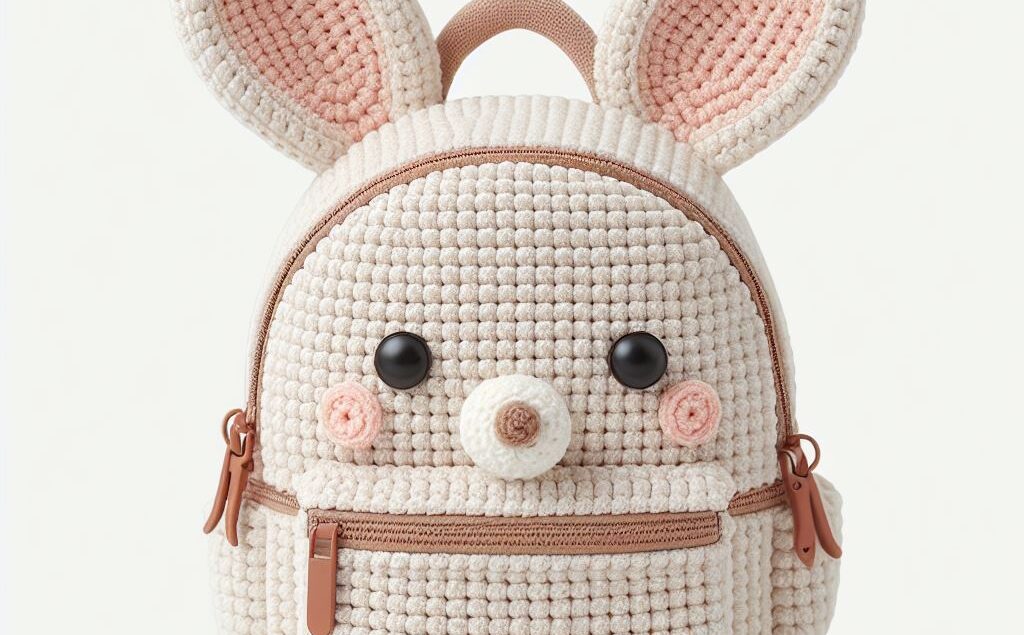
Crocheting can be an incredibly rewarding hobby, especially when you create something as cute and functional as this adorable bunny crochet backpack. This delightful accessory is perfect for kids and adults alike, adding a touch of whimsy to any outfit. The bunny design, with its sweet face and floppy ears, makes it a standout piece that is sure to attract compliments.

Creating this backpack involves following a detailed pattern, but the end result is a unique and charming accessory. Whether you’re an experienced crocheter or a beginner looking for a fun challenge, this project is sure to bring joy both during the creation process and every time you use the finished product.
How to Make an Adorable Bunny Crochet Backpack
To create this adorable bunny crochet backpack, you’ll need some basic crochet supplies and a bit of creativity. The end result is definitely worth the effort, and you’ll have a unique piece that’s both functional and eye-catching. This backpack can be a fantastic gift for a friend or a fun addition to your own collection of accessories.
Start by gathering the materials: yarn in beige, pink, white, and black, a crochet hook suitable for the yarn weight, a zipper, and some basic sewing tools. Follow the detailed steps provided below to crochet each part of the backpack and assemble them into the final product.
Recipe for Adorable Bunny Crochet Backpack
Materials Needed:
- Yarn in beige, pink, white, and black (worsted weight recommended)
- Crochet hook (size H/8 5mm recommended)
- 12-inch zipper
- Scissors
- Tapestry needle
- Stitch markers (optional)
- Polyfill stuffing (for the 3D elements)
Abbreviations:
- ch: chain
- sc: single crochet
- hdc: half double crochet
- dc: double crochet
- sl st: slip stitch
- st(s): stitch(es)
- inc: increase (2 sc in same st)
- dec: decrease (sc 2 sts together)
Instructions:
- Base of the Backpack:
- With beige yarn, ch 41.
- Row 1: Sc in 2nd ch from hook and across (40 sc). Ch 1, turn.
- Rows 2-50: Sc in each st across. Ch 1, turn.
- Fasten off and weave in ends.
- Front Panel (Bunny Design):
- With beige yarn, make a magic ring.
- Round 1: Ch 1, 8 sc in ring. Tighten ring and join with sl st to first sc. (8 sc)
- Round 2: Ch 1, 2 sc in each st around. Join with sl st. (16 sc)
- Round 3: Ch 1, sc in next st, 2 sc in next st around. Join with sl st. (24 sc)
- Continue increasing until the piece measures approximately 7 inches in diameter.
- Switch to black yarn for the eyes: make two circles (magic ring, 6 sc in ring, 2 sc in each st around for next round).
- Use pink yarn to create the cheeks: make two small circles (magic ring, 6 sc in ring).
- Use white yarn to make the nose: make a small circle (magic ring, 6 sc in ring).
- Ears:
- With beige yarn, ch 11.
- Row 1: Sc in 2nd ch from hook and across. Ch 1, turn.
- Rows 2-15: Sc in each st across. Ch 1, turn.
- Fasten off and repeat for the second ear.
- Back Panel:
- Repeat the base instructions using beige yarn.
- Sides and Bottom:
- With beige yarn, ch 11.
- Row 1: Sc in 2nd ch from hook and across (10 sc). Ch 1, turn.
- Rows 2-100: Sc in each st across. Ch 1, turn.
- Fasten off and weave in ends.
- Assembly:
- Sew the sides and bottom panel to the front and back panels using a whip stitch.
- Attach the zipper to the top opening using a needle and thread.
- Straps:
- With beige yarn, ch 6.
- Row 1: Sc in 2nd ch from hook and across (5 sc). Ch 1, turn.
- Rows 2-70: Sc in each st across. Ch 1, turn.
- Fasten off and sew the straps securely to the top and bottom of the backpack.
- Final Touches:
- Weave in any loose ends and ensure all parts are securely attached.
- Sew the ears evenly to the top of the front panel.
- Attach the eyes, cheeks, and nose to the front panel.


